Image Map

Win a FREE year of ESGI: It will Flip the Way You Test Students!

Win a FREE Year of ESGI, My Favorite Thing!
Do you know what ESGI did for my class? 
1. It was the reason my students started to beg to be tested!
2. It saved me hundreds of hours testing, recording, & creating RTI.
3. It gave my administrators and me useful data to drive my instruction! 
And YOU can try it 
FREE for 60 days 
(no credit card required) 
+ enter my code KFUN 
and you will automatically qualify for 
$40 off of your 1st year!
Just CLICK HERE to get started!

This is why I love ESGI:
CLICK THE IMAGE
CLICK THE IMAGE.
CLICK THE IMAGE.
CLICK THE IMAGE.
CLICK THE IMAGE.
CLICK THE IMAGE.
CLICK THE IMAGE.

CLICK THE IMAGE.
CLICK THE IMAGE.
CLICK THE IMAGE.
CLICK IMAGE TO GRAB YOUR FREE TRIAL.
<<< ENTER THE RAFFLECOPTER: >>>
The Rafflecopter will begin on Dec. 27!
Winner will be announced on New Year's Day!


Freebies for the first week of Kindergarten

Hello everyone! It's Cori from Mrs. B's Beehive! I hope everyone is soaking up the last of their summer vacation!!   Today I am sharing a blog series on lesson planning that I did for the first week of school!  Scroll through to see what I will be doing day by day, and grab A TON of freebies to help you with your first week back to school!


I've been wanting to do a series like this for many years.  Every time the beginning of the year comes around, I think about my first year teaching.  I got my position 2 weeks before school started, and to say that I was panicked and stressed is an understatement!  I scoured the Internet for advice and ideas. I gathered everything that I could, and really had no idea what I was doing!

I work at a school where there's only one teacher per grade level, and the pre-k teacher, along with the first grade teacher were newbies right along with me that first year!  I desperately wanted someone to tell me exactly what to teach to get through the first week.  After that week, our regular schedule would start, and I would begin on the curriculum that was given to me (which wasn't much of anything, but that's for another time : ) I felt that if I could make it through that first week, I just might be okay : )

I'm hoping that young teachers out there can find these resources, and that they will help to ease some of those first week nerves and frustrations.  Each day in this blog series, I am going to base the resources off of a common back to school book.  You can read the book to your students, and then do the FREE activities that I have provided.  Today we will be talking about The Kissing Hand.

Product Details

I have tried so many different activities in the last 8 years for the first week of school.  I have tried a center set-up, I have tried beautiful art projects that require a lot of work ahead of time on my part, and I have tried activities that require a lot of assistance the day of, as the students complete them.  While I do try to incorporate some of these elements into our day, I am also a lot more realistic now about what we can accomplish, and what will keep more gray hairs from sprouting on my head!

Let's be honest, as the students come in and work, you are working like a mad person to put all of the supplies away.  You are also juggling those last couple of parents who won't stop taking pictures from the doorway, kids that are crying and need reassurance from you, and kids that are suspiciously eyeing the door, ready to run the minute you have your back turned (it's happened before, I suggest wearing comfortable shoes for unexpected mad dashes!)

We run on a mini-day schedule for the first week, so here is what day 1 looks like.

A good mix of activities, assessment, and teaching procedures.  We come in and begin work on a simple coloring page.  Sometimes the ability to open up a brand new box of crayons is all that it takes to give a reluctant child some peace!


Next, we come to the rug, and start to go over our calendar routine, and I introduce our first classroom rule.  Here is a product of mine that you can get off of TPT that gives some visual back-up to the rules.


After that, we start on our routines, we walk around the school, practicing that ever elusive straight line.  We have our bumpers up in front of us, and travel around to the different spots on campus that are important for them to know.  At this time, I show them the bathroom and water fountain (we don't have any in our classroom), and we talk about the procedures for dismissal as well.  I created this free list of procedures to help you try and remember all of those little things that you need to go over with your students at the beginning of the school year.


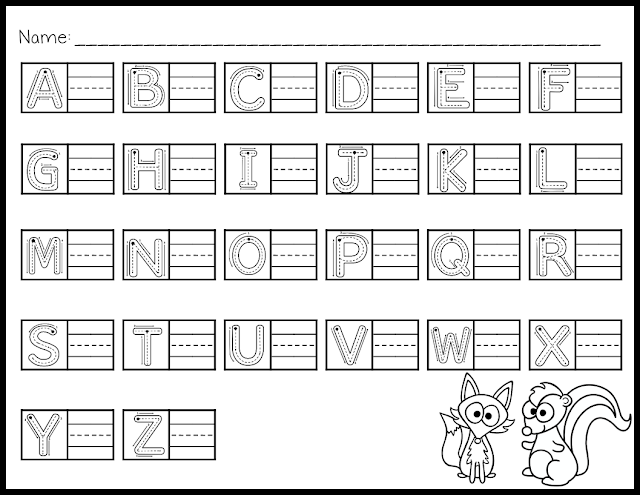
The first week is a great time to get some assessments done, and begin to plan out some of our small group activities.  On the first day I do an upper case inventory to check out their fine motor skills and letter formation.


I cover some more routines concerning recess and the fire alarm, which just so happens to be conveniently located in our snack area.  After we finish with that, I read them The Kissing Hand, and I do a quick check of their color knowledge.


I teach some more routines, and then we move into math.  I want to get a quick sense for which students have the basics down when it comes to number recognition and counting.


Next up is a quick art project that aligns to The Kissing Hand. 


After the art project is all cleaned up, we talk about dismissal routines, and we pack-up and go!  Every year I plan more activities then I will get to.  Things never go according to plan, but if you have all of your materials organized ahead of time, and are over-prepared, it brings your stress level down, and you can enjoy your new little people, and really start getting to know them!

Here is a quick breakdown of all the resources you can find in this post:

Check out the rest of my Kindergarten week in these blog posts!


Are You Ready To Win a $50 GC and...

Start Your New School Year Right? 

Well, I have just the thing that can change your life! 

This was me:

I needed a Super Hero!


I started using ESGI in my kindergarten classroom in 2008 and I immediately gained:
1.  Instant data on EVERY student's skill level.
2.  User-friendly reports for parents & admins.
3.  Students who begged to be tested! Really! :)
to get started!

And, if you sign up for a FREE 60-day trial (no credit card required), you also automatically qualify for $40 off of your 1st year, but you must enter the code:  KFUN 

AND:
Start your FREE trial 
and you will be automatically entered to win 
one of 10 Amazon Gift Cards!

So, let's get started:
and sign up for your FREE trial.
Remember to enter the code KFUN.

Then, enter the names of your students, 
their gender, & home language. 
(YES, ESGI will generate a letter for your parents in English or Spanish!)


What, You Aren't Using ESGI Yet?
You will love all of the built-in tests available on ESGI's website...

...but if you need to use specific assessments, just reproduce them using ESGI's built-in test builder. You can create your own unique tests! They even have built-in fonts and graphics to help you. Visit their site and check out their video tutorials and see how easy it is!

Let's Get To Testing:

Your students will beg you to test them so they can watch their data circles fill up and turn green! 
You can test on a desktop, a laptop, or even an iPad. 

My in-coming students LOVED testing with ESGI.
The teacher asks the question seen on the screen and then clicks "yes" or "no" based on the student's answer. Easy, breezy, lemon squeezy!


And Then There Is The Data:

Incredible data on each and every skill tested.


This is why I LOVE the bar graphs:
If you click on the grey part you see the names of the students who did not get that question correct! Can you spell RTI??? There it is for you!

ESGI also tracks each individual student's progress. The grey circles turn green as each student masters the skills on each test. Your students LOVE to see their circles turn green, so they will often beg you to test them! 


Click the chart for more info. 

Then, There Are The Flashcards:

Individualized flashcards for each student!
I called them "skill cards" because I stored each child's cards in a sandwich-sized ziplock bag to use as a reference as to which skills each child needed to work on. 

And Then, There Are The Parent Letters:

These are so much better than any report card, so I just stapled the parent letter to the front of the report card because it was easier to understand. 
They come in English or Spanish!
And there is so much more!
If your school or district decides to provide this for multiple teachers, there are even more discounts. Get started with the code KFUN, and contact ESGI for further multi-teacher discounts. 
CLICK HERE to get started!

ESGI saved me so much time, I was able to actually go home and take a break!
Start your FREE trial and you will be automatically entered to win one of 10 Amazon Gift Cards!


Book Study: Chapter 7 - Comprehension Strategies with a Freebie!

Hi guys! It's Cori from Mrs. B's Beehive, wrapping up our book study on Jan Richardson's newest guided reading book! I read the first version of this book almost 5 years ago, and I'm happy that I purchased and read this new addition.  As has been mentioned before, I love that it is spiral bound, and can easily sit on my desk as I teach small groups.  There is so much information in this book that it can be overwhelming! Having the book beside me as I teach will help me recall and utilize all of the important steps in a guided reading lesson.


Chapter 7 is all about comprehension.  Guided reading means nothing, if the students don't understand what they are reading.  In this chapter, Jan Richardson provides 12 comprehension strategies to use with the students.  For each comprehension strategy, she provides 1-3 lesson plans on how to teach that particular strategy.  Not all lesson plans are geared toward our little people, but I would argue that they could all be modified to fit our needs.

After reading this chapter, I felt overwhelmed again.  This book is packed with so much information, that it is hard to digest!  To make the comprehension piece a little easier, (and because I'm a very visual person) I put together this comprehension sheet for us to use.  My idea, is that you can laminate it, and keep it at your desk or in your guided reading binder. When you come to the comprehension section of the lesson, you can glance at this sheet to decide which strategy you would like to use to check for understanding.  As the students become more familiar with the strategies, you can even have them choose how they would like to share their learning!


If you would like a copy of this chart you can find it in the link below:


I hope you find this helpful, and thank you for following along with us on this book study.  Use the image below to pin this to Pinterest, if you would like to come back to this series at a later time.