Image Map

Beginning of the Year Literacy Centers: Taking it one day at a time...

Hey, friends! 

It's Breanna from A Pinch of Primary and I am sharing how I take it day-by-day during my literacy centers at the beginning of the year! We are 31 days into school and we are rocking it so far!

 

My school follows the Daily 5 model, so we do a lot with building stamina, so we literally and figuratively take it day-by-day. I LOVE LOVE building stamina. It is such a great way to show the kids that they are capable of working for longer periods of time the harder they work. We do a lot of charting and graphing of our learning progress with data binders, so this is a GREAT way for them to see their growth and get EXCITED about learning. I am talking CHEERING and CLAPPING when our stamina chart jumps (and not just from me haha)! It's a beautiful thing when we hit 20 minutes on our stamina chart!

Now, at first, literacy stations are very basic. We start with Read to Self and the other parts of our literacy block like phonics and such just become more like mini lessons and guided practice until we really get into the nitty-gritty of Word Work, Listen to Reading, Work on Writing, etc. We do a lot of name activities at the beginning and discussing how we use our materials.

Step 1 of taking it day-by-day:

Introduce EVERY. STEP.

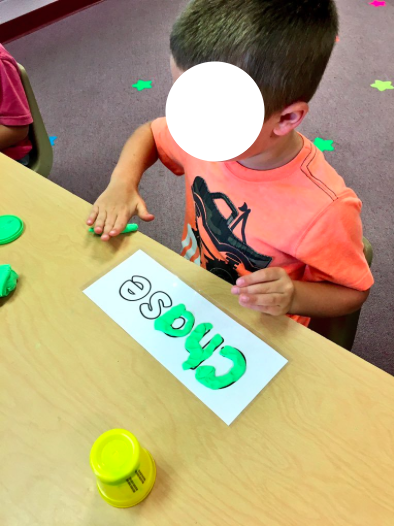
Just like every other procedure we teach, literacy stations should be treated the same way. I am oh so blessed with the only carpeted kindergarten room. Yes, it's nice and cozy for sitting on the floor, but it is not Play-Doh friendly. Play-Doh is my go-to first literacy station and you better believe we practice taking the lids off and how to pick the Play-Doh up like it's a sponge. Play-Doh is a huge hit and works so well for so many activities. I use name mats and then I introduce the placemats for Play-Doh on the floor. The key is in the details. I DO NOT have time for dried up Play-Doh week 1, so we practice it and practice it and practice it again.

Step 2 of taking it day-by-day

Don't give a million options.

Yes, if you're like me, you're remembering your now 1st grade babies and remembering how they could basically find everything and knew exactly how to do each and every station, but these adorable, new faces don't know your classroom like they do. Introduce one station and get them used to it. Then, introduce something else. I am so guilty of trying to introduce multiple things at one time to save time, but I always regret it. Give them a second to feel comfortable with the activity and then introduce something new and exciting. I PROMISE they will be PUMPED when a new activity surfaces in your literacy station area. They WILL spot that new letters game you set out. They might not be able to find their chair in the morning, but they'll usually notice something new (or maybe that's just my kids?!).

Step 3 of taking it day-by-day

Make them confident and independent in their work

Now, I think this is pretty self-explanatory. SHOW them they can be the experts. Let them be the experts. They are brilliant sponges and they can do amazing things. Now, it's not going to happen day 1. We lasted 20 seconds during literacy centers and we had JUST discussed learning to be independent readers of pictures and text. They clearly didn't get it the first time or the first 7 days, but they have now learned how and they are still learning how. Give them the ability to show you they are capable and they can do anything. (And you can get your reading groups in without little ones coming up to you with problems or questions!)

Literacy centers are time consuming, but so rewarding when you can see how how they are working and how engaged they are.

What are your tips for literacy centers at the beginning of the year?

Resources Round-Up - Literacy Centers


Hi guys!  It's Cori from Mrs. B's Beehive, and today I wanted to share with you my very favorite resources for literacy centers.  I've gone through many different centers over the years, and have changed things up what seems like a million times, so these resources that I am about to share with you  have been tried and tested, and really work well for kindergarten!

  I'll start with DeeDee Wills' resources, because I feel like she is always spot on as far as kindergarten skills go.  My favorite is the Writing Work Station.  This center requires little prep, and the students quickly understand how to complete the tasks, and stay engaged.  I use the labeling pages the most.

Writing Station The COMPLETE Set

Just Roll With It is another fun and engaging center.  You have to purchase the dice that go along with it, but my students absolutely love using the dice, and this is another center that is easily explained, and that the students can do independently.

Just Roll With It The COMPLETE Set

Next up are the center resources by Elizabeth Hall.  I would say that these resources require a bit more attention from the teacher at the beginning of the year, but they address important skills with the kids.  The first is Dictionary Drive, which gives students experience with finding letters, and then words in the dictionary.  I love how the skills build on each other, and once the students get the hang of it, they can complete it independently.  

Dictionary Drive {editable}

Words Under Construction gives the students extra practice with sight words, and allows them to use manipulatives to spell the sight words as well.  I like that both this center, and the Dictionary Drive center are editable as well.

Words Under Construction {editable options included}

Just my type is always at my computer station.  I start with the beginning sounds pack, then move on to the picture labeling, and then end with the sentence writing.  Again, I like how the skills build on each other, and also the fact that my students are learning simple computer skills like how to use the mouse, and where the letters on the keyboard are.

Just My Type {Beginning Sounds}

The last three that I use are ones that I have created for Read the Room, Write the Room, and I-Spy.  These are also resources that can be used the entire year with skills that build upon each other.

Kindergarten Centers MEGA Bundle

If I need any extra material, I always look to Annie Moffatt and her monthly NO PREP packets.  These packets are so full of amazing skills review!!!

All Year Math and Literacy NO PREP The BUNDLE (Kindergarten)

These are my go to literacy center resources.  What am I missing?  What do I need to add to my list?  Please share in the comments section what your favorite literacy center resources are!

Beginning of the Year Literacy Centers with Seesaw

Hey there, Kinder Tribe followers!  I'm Brittany from Mrs. Banister's Kindergarten Kids, and I'm here today to talk to you about beginning of the year literacy centers!

Can you believe it's already September?!?!  We have been in school for 19 days, and routines are established, expectations are known, and 1/9 of the way through the school year.

Literacy and math centers are two of my favorite parts of the day, and I know my kiddos love that time as well.  We started this small group time the first full week of school this year (As every teacher knows... Sometimes it's later than that depending on the group of kiddos!), and they have been smooth sailing ever since!

I teach in a 1:1 classroom, where every child has an iPad mini.  We use technology often throughout our day, but we also love to mix in traditional centers like Play Doh, pocket chart, and manipulatives, like pattern blocks and snap cubes.  We don't do too many worksheets, if you get my drift. :)

These students love to use the app Reading Eggs to practice literacy skills.

A little Chicka Chicka Boom Boom sand table action...

Stamping sight words is always fun!

Play Doh is always a hit.

Pocket chart color sorting from Deedee Wills

Those differentiated dice are my jam... We love to use them at the roll and cover station!

Pattern block puzzles are a math center favorite!  (Pack from Katie Mense)

One issue I have encountered in doing centers in a hands-on way is the lack of evidence to parents that we are working while at school. :)

Enter Seesaw!


Seesaw is a free, simple way for your students to share their school day with their parents, and it also gives you a way to hold your students accountable for their work.  

After you sign up for an account and create your class, you can share your class code with parents.  From there, they can access anything their child uploads to their portfolio.  

Sidenote:  You do not have to be a 1:1 classroom for Seesaw to work for you.  Students could access their own accounts (which Seesaw makes it simple by assigning each kid an animal avatar) on just one device.  Seesaw will literally work for any tech situation!

Here, students were to make shapes with straws.

This student uploaded a ChatterPix of her favorite part of the story Pete the Cat, I Love My White Shoes.

Although we just started using Seesaw in our classroom, students are already accessing their portfolios independently.  My students love uploading their work so their family can see it.  So far, we have had moms, dads, and even siblings leave feedback for their Kindergarten Kid!

Little do the kiddos know, but Seesaw also allows me to hold them accountable for their work.  Since I have to approve every item that goes into their portfolio, I can see who has done their work and who has not.  It makes my life so much easier!

If you haven't checked out Seesaw yet, DO IT!  It will make your center time so much easier, as well as the rest of your day!

Fine Motor in Kindergarten

Hi everyone! It's Kelly from My Fabulous Class. I imagine many of you are settling back into school...and I know a few of you are STILL enjoying summer! We are on our third week. At the beginning of the year, I like to assess students on some basic fine motor skills. Can they do the basic skills of writing, gluing, and cutting? What about picking up small items? I have two FREE activities to help you assess these fine motor skills.


First up, cutting. These are HARD lines for kids to cut. I like to talk about taking "small bites" with the scissors. I model big bites, which is opening the scissors all of the way, and small bites, which is only opening them a little. After students cut it all up, I have them glue it on construction paper to have a display, but you could just as easily have students recycle the strips.


I LOVE these little glue dot apples. It's hard to see from the picture, but there are actually 3 sizes of sequins! Squeezing a dot of glue onto a dot is a pretty challenging fine motor skill. We talk about the different using the "right amount" of pressure when you squeeze. I model too little pressure and too much pressure before I have students practice. Then, you add in the fine motor skill of picking up tiny sequins, and wow, you'll be able to quickly assess a student's fine motor skills.

You can get both of these activities FREE HERE.

Now, you may be wondering, what do I do if my student has poor fine motor skills? Check out these posts.

This post is full of FREE ideas with play dough, dabbers, tweezers, and more. 


This is another great post with clothespins and pipe cleaners. I hope this helps you all!


My 4 Favorite FUN Fine-Motor Activities + A FREEBIE

You won't believe the one we do EVERY day!

Looks like trash, but it develops small muscles.
READ ON to find out how.

My first favorite fine motor activity:
It is a center that my students loved from day 1.
You can use yarn or long pipe cleaners. 

I got some cake cooling racks at The Dollar Store, cut up some strands of yard, and let them have fun.
I taped the ends of the yarn with clear tape to prevent fraying.

Some of the students loved weaving patterns, others just wove random colors, but everyone was working on their fine motor skills!


My second favorite fine motor activity:
It is a sight word center. It looks like spaghetti and meatballs, but the students had to match the pairs of sight words! You can make this out of large wooden beads, but I made mine in kind of a funny way. 
This center works best when two students can help each other find the matching sight word. 

Our PTA gave me a bag of Dum-dum candy pops for my class. I didn't want to give them candy, so I bought them a basket of organic blueberries and I was going to throw the Dum-dums away when I got this idea. 

I unwrapped them, cut the sticks off, and applied pieces of torn brown tissue paper with Mod Podge. (You can find Mod Podge at a craft store like Michael's.) 

I never did tell them that their were candy lollipops inside these meatballs!
Then, I applied a little piece of paper to each "meatball" with a sight word printed on it. I made two matching meatballs for each sight word. Last, I gave the meatballs one last coat of Mod Podge and let them all dry. 
Add extra bowls to collect the matching meatballs.

The next day, I placed the meatballs in a small colander with a handful of rubber bands. I didn't even bother to cut the rubber bands! I added a pair of tongs, a checkered tablecloth & two chefs' hats and that's it! 
You don't need a fancy colander. You can just use a plastic bowl.

This center was a favorite!

My students took turns grasping a meatball with the tongs and having their partner find the matching meatball in the pile of spaghetti! They LOVED it!


My third favorite fine motor activity:
It is my PIN LETTER CARDS. I ran these dotted letters on card stock and let my students place one card on the carpet. Then, they used a push pin and poked a hole through the card and into the carpet until every dot was poked. Then, they could take it home to tape to a window and let the light shine through their letters! They loved making one of these each week for 26 weeks and they strengthened their fingers while having fun!
They wrote their names on the back before they began.
This Pin Letter Set also comes with number cards!  You can grab a set by CLICKING HERE.


My fourth favorite fine motor activity is the one we did EVERY day!  
In fact, we did it several times a day! This is how it worked...
I always asked my students to try to create only one scrap whenever they have to cut anything out.
This is from my Pocket Locket set.
Students create a locket or a pocket watch with the letters from their sight words.

This took pre-planning and lots of thought, but wait, it gets better...
This Pocket Locket is for the sight word "I".


(These are my my SIGHT WORD POCKET LOCKETS. Once made, students may wear their sight words home as a locket around their necks or as a pocket watch in their pockets.)


Then, I asked them to always fold their one large scrap as many times as they could. Now, I think that any piece of paper, no matter how large or small it is, can only be folded a maximum of seven times*, but my students always tried to fold their scrap even more times. 
They would fold, press, and squeeze with all their might!

We called this our "finger exercises" and, since we did this several times each day, it did actually build up the muscles in their fingers!
They made their scraps as small as they could!

The added bonus was that our trashcans did not overflow with large scraps of paper. :)
Your trash can won't overflow like this one!


*Disclaimer: In January 2002, a junior in high school, Gallivan, demonstrated that a single piece of toilet paper 4000 ft (1200 m) in length can be folded in half twelve times. 

Did you like my Sight Word Pocket Lockets? You can find them by clicking HERE.
Click the image to grab your FREEBIE.

I also have two you may have for FREE by CLICKING HERE. 

You may visit my TpT Store by CLICKING HERE. 

Well, that's it for this month, my friends. Look for my next post on Sept. 30! :)

Palma

How to Increase Fine Motor Strength in Kindergarten

Hi guys!  It's Cori from Mrs. B's Beehive continuing our August conversation about fine motor skills in Kindergarten!  We all know the importance of fine motor skills, but unfortunately, a lot of our students come in with underdeveloped fine motor skills. They also lack the strength that they need in those tiny hands to wield a pencil or scissors appropriately.  So today, we are talking about one way that you can increase hand strength in your students.


There are many different activities to help students increase their agility with regards to fine motor skills, but one of the best ways to increase their strength, is through the use of hole punches.  Hole punches can even be challenging for adults at times, especially when we shove too much paper in    : )  The grip and strength that students need to punch out a hole in a piece of paper, uses just about every muscle in the hand! Punch card activities can build the strength in their hands very quickly!

I created this quick freebie for you to use during the first couple of months at school. You can use it in small groups with students who are working on increasing their fine motor skills, or you can use it during center time, and let all students get a chance to grow their hand muscles.


There are 5 different templates for the kids to use.  You don't have to cut the shape out completely, just cut it into a square, and the hole punch will be able to reach the holes.


My kids LOVE using hole punches, especially if one of those happens to be the teacher's : )  If you are interested in this freebie, just click on any of the pictures in this post, and it will take you to the document in Google Drive.  I hope you find these templates useful, and please comment below with other hand strengthening activities that you like to use with your students!


Fine Motor Frenzy

Hey everybody! It's Breanna from A Pinch of Primary. 


This month on the Kinder Tribe blog, we will be talking about the ever-important FINE MOTOR. It's a FINE MOTOR FRENZY in August. For me, it's back to school this coming Tuesday (yes, so jealous of all of you that still have this beautiful summer to enjoy) and the beginning of K is crucial to developing the skills that are so important. This short and sweet post had a much grander plan, but then Back to School Night happened last night and it just hit me that I was watching CRUCIAL things happening right before my eyes.


My first station at BTS night was the kindergarten signature. This is beautiful for many reasons, you see who can write their name, who needs help from big sis, what their favorite color of marker is, and most importantly...who can HOLD the marker correctly and adjust when needed. Just like we all see, I had everything from holding it at the top to the whole-hand grip and then I had the veteran walking in with their fancy big kid grip. (You go, kiddos) I was taking mental notes of each and every "pencil" grip I could. Granted, these were markers so the utensil was a little bit different than normal, but it gave me a lot of insight on who will immediately need a lot of support in that area.

Another station I implement during BTS night is emptying their supplies. I set an example school box out and the parents were FABULOUS about letting their child put away their own supplies (without teacher prompting--insert PRAISE HANDS) Almost every single one of their supplies needed opened. The glue stick 80 packs we require on our lists always need opened and every other supply that comes in a tricky package needs opened. These packages were ALL opened by the kids. Some took 10 minutes to open all of their supplies and some were done in two minutes. I could SEE the concentration in their faces. It was a true struggle for some.

There are SO MANY amazing fine motor activities to practice the first week of school--tracing lines, cutting lines, using tweezers, Play-Doh, etc. What are your favorite activities to do to promote fine motor skills?