Image Map

Fall Fun CGI


Hello Kinder Tribe Friends! This is Meghan from Meghan's Pad. Are you having a hard time starting your CGI groups?  Do your kiddos long for math group?  Do you Kinders want to practice CGI during independent time?  Well, I am able to answer yes to all of these questions!

Wait, what?  I for one was having a hard starting my math groups this year.  I wanted group time to be fun, engaging, and something that the children would want to come to.  After much thought, I came up with the perfect solution.....CGI games!

My kiddos now love math group AND ask to play this game during free choice!

This is how it works:

You have the choice of 3 different game boards AND 3 different levels of cards.  Since our focus this month was on addition, the game cards are only join result unknown (JRU), but each set focuses on different sums (to 10, crossing the decade, and to 20).

During group, I call the kiddos to my table.  Player 1 goes first by picking a card.  We read the card together and everyone solves the math story (I make sure to have cubes, whiteboards, fun counters, etc.).  Once everyone has solved the math story, Player 1 says there answer.  If someone got a different answer we talk about how we solved it, and then solve it together.  If Player 1 got the answer correct, they roll the die and move that many spaces.  The game continues with each player picking a card and solving the math story.

If you are interested in the game, you can pick it up for free here.

Here are a few pictures of the game.  I hope you all enjoy!  What do you do to engage and encourage problem solving in math?


Kindergarten Round Up + a FREEBIE!

Hey everyone!! Emily here, from Carnes' Corner.  I'm so excited to be here with you!

******

For the second year in a row, my kindergarten team has hosted a "Kindergarten Round Up" for our incoming kindergartners.  We LOVE doing this, because it gives us an opportunity to meet the students who are going to be spending the year with us next year AND it gets the students excited about kindergarten!

I wanted to share some tips to make YOUR kindergarten round up a successful one!  Of course, we were so busy, I didn't get many pictures...I know; terrible blogger status...bare with me!

SEND OUT INVITATIONS
*I designed an invitation for us, and our principal emailed it out to all of our incoming families! They had two afternoons to chose from...of course, the second night was definitely busier than the first!  (I may even recommend dividing it, and assigning nights for parents.)


SIGN IN STUDENTS BY GROUPS
*We divided the kiddos in to three groups when they were with us, so to help with that, we used three different clip boards (each with different colors).  We use coordinating sharpies to write their name tags, so that when we took the kiddos to our rooms, we could just say "blue group come with me", etc.

HAVE A PHOTO BOOTH
*Our art department had an old barn left over from their art show, so we borrowed that and one of my team members made some precious cowboy photo props (think hat, sheriffs badge, etc.)
*This worked well for TWO things...we now have pictures with each of the kids so we remember who they are AND the parents had fun taking pictures of their kiddos. :)

KEEP THE PARENTS IN A MEETING
*The parents stayed in the Multi-Purpose room with our AP and discussed all of the important topics, got a tour, etc.  This kept them busy while we had their kids, and allowed them to concentrate on all of the boring parent stuff!

TAKE THE KIDS FOR ASSESSMENT(ish)
*Like I said, we had the kids in three groups.  We rotated each group in 15 minutes segments (math assessment, letter assessment, bingo/behavior assessment).  I created one assessment sheet for each child, so that all of our info was together.  The kiddos just traveled with their papers:


Here's a sneak peek of what we had the children do on the sheets:


And the recording sheet the "behavior" team used...


To make your kindergarten round up go a bit more smoothly, I want each of you to grab the assessment packet for FREE!!  Just head over to my TpT store to download it!

Math Center Management

I don't know about you, but it seems that every year I am trying to streamline my math centers.  I want to not only make my life easier, but I also want to make it more manageable and meaningful for my students.  


This year I tried something a little bit new.  

First of all, I have my math center rotations on a SMART notebook so I can easily put it up on my SMARTboard.  No more finding a spot in the room for a rotation chart that we use once a day.


Each day I just move the circles to the next center and then save the changes to the notebook before I close it after center time.

Secondly, I bought these drawers last year and decided they would be perfect for my math centers.  I have them numbered.  They also easily come out.  I have my students take the whole drawer to their table.


Lastly, in order to make things easier for myself.  I have kept the centers somewhat similar in each drawer.  Here is what my math centers look like:


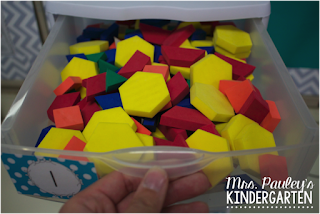
Center 1 - pattern blocks
Center 2 - matching game and/or CRASH
Center 3 - changes each week
Center 4 - iPads
Center 5 - roll & color games
Center 6 - spinner games

As you can see, my students know instantly what they are doing at each center each week.  I don't keep the exact same activity in the drawer every week, but they are somewhat similar.  In my pattern block drawer, I use Elizabeth Hall's pattern block activities from her B.U.I.L.D. math centers.  (You can grab them here)

The centers change with each theme I am teaching, but the way to play the games/centers is usually the same except for center three.  I like to have one that I can change up.  I always teach that center whole group before I ever expect my students to do it on their own.  

During the time my students are doing math centers, I am pulling small groups.  I pull a group who needs some reteaching and I pull another group for enrichment.  I love having the opportunity to pull these students.  

Do you do math centers?  If so, I would love to hear how you manage them.  Sound off in the comments below!


What Worked Well Wednesday Is All About Rekenreks & Common Core Math!

Rekenreks Big and Small:

Since I retired last summer, I decided to write about something that worked in my classroom last October. I made this giant classroom Rekenrek and my students made their own seasonal ones.
Rekenreks are so cool. Students can instantly recognize any number of beads from 1-10 because they have five red and five white beads so they quickly learn that all of the red beads plus one white equals six.
Scroll down to see how to make your own classroom Rekenreks...
Using our big classroom Rekenrek along with our small seasonal Rekenreks.

I just love Rekenreks.  I learned about them just over two years ago and I have included them in my presentations at conferences for about that long.  They just make math real and the small ones are perfect for Number Talks.

My students LOVED using their Rekenreks with ten frame cards, numeral cards, and number word cards. They just looked at the card and showed the same value on the Rekenrek. This worked great with partners.

Rekenreks Big:

Here is my giant classroom size Rekenrek: (and that's Seba, the cat.)
I think my cat was subitizing.  :o)

(Scroll down to see how to make one for your classroom for under $10.)

Rekenreks Small:

I liked making seasonal Rekenreks with my TK class. Last fall, we made pumpkin Rekenreks with only one row of ten beads; five red and five white.  

Fun Foam pumpkins, pipe cleaners, 5 red pony beads & 5 white pony beads.
I drew 2 tiny dots where the pipe cleaners should pierce the Fun Foam.

We made our first Rekenreks with only one bar of ten beads.
Later, we will add a second bar for the numbers 11-20.


Getting to make their own Rekenrek was FUN and they took better care of them because they made them.
They wrote their name on the back with a felt tip marker.

We added an additional row of ten beads when we made our winter Rekenreks.

So, What Is A Rekenrek?

It's a number rack that was designed by Adrien Treffers, a mathematics curriculum researcher at the Freudenthal Institute in Holland.  By building each row of your Rekenrek with five white beads and five red beads, students can instantly subitize (or instantly recognize the value) the number of beads you slide from the right side to the left side.  

Once students realize that there are five red beads and five white beads, it's easy to quickly slide any number of beads from the right side to the left side without counting.  

They use the 5 red beads as an anchor and they can quickly find six by sliding one white bead, along with the red ones, over to the left side.  It's just as easy to locate the 2nd white bead to slide with the red beads to show seven.

You can download, for FREE, a great booklet filled with ideas for using Rekenreks from the Math Learning Center web site.  CLICK HERE for the direct link.

You should also check out the Math Learning Center's web site by CLICKING HERE.
They have tons of ideas under the <resources> tab.

How To Make A Classroom Rekenrek:


It cost me about $9 for everything and it takes about 30 minutes to make one; 15 minutes if you have help.  

Step 1:  Buy materials

2 pool noodles (The 99 Cent Store still has these.  They are up at the very front of the store.)
2 10-foot lengths of 1/2" PVC pipe  (You need just over 13 feet to make the one above.)
2 elbow joints (for 1/2" pipe)
4 T joints (for 1/2" pipe)
4 end caps (for 1/2" pipe)
A can of solvent (like Goof Off) to remove the lettering on the pipes
Paper towels for removing the lettering

My receipt from Lowe's 

You will also need a bread knife for cutting the pool noodles and a PVC pipe cutter or saw.

Step 2:  Cut the PVC

You will need 2 pieces for the sides that are 36", 2 pieces for the bars that are 30", and 2 pieces for the feet that are 20".  Cut the 20" pieces in half to 10" each.  Cut the 36" piece into 2 pieces:  1 should be 26" and the other should be 10".

My husband cut the PVC while I cut the pool noodles.
By working together, we were able to complete this project in half the time, just 15 minutes.


Step 3:  Cut the pool noodles

Mark the pool noodles to measure 1 1/4" pieces.  You will need 5 of one color and 5 of the other color.  
Using a serrated bread knife, try to make straight cuts.  You can trim them down with scissors if needed.

A serrated bread knife works best for cutting pool noodles.
Use the extra noodles to share with a colleague or check out Pinterest for all the
amazing things you can do with pool noodles in the classroom.


Step 4:  Assemble your Rekenrek


Slide the pool noodles onto the bars and attach the sides and bars to the joints.
You can add glue to the inside of the joints to make it more durable. 

One elbow joint and one T joint.

From left to right: Elbow joint, 10" of PVC, T-joint, 26" of PVC, T-joint, 10" of PVC, cap.
The next part will be the other 10" piece of PVC for the 2nd half of the stand and a cap.


The feet.  Each side is 10 inches.

One complete side.
The top half is 10" tall.  The bottom is 26" tall.


You can see the writing on the pipes.  Next step is to remove that.

Step 5:  Clean the pipes

Clean the writing off with a solvent like Goof Off.  Spray it on a paper towel (outside) and rub it on the lettering until it is all gone.  Rinse the solvent off of the pipes before bringing it to school.


That's all there is to it !!!


And there's an app for that:


Click the image to view the app.
Perfect for iPads or iPad minis.  Also works on iPods and iPhones.


  Or you can buy them here:

Click the image to see the product's site.


Looking for more FALL MATH ideas?
Check out the bloggers who link up below: